Trimming your beard as it grows is a key part of beard maintenance. Just a millimetre too much can turn a beard from one that makes people jealous into a facial abomination. That said, with a few simple rules and instructions on how to trim a beard. You can easily keep your fuzzy face friend looking its best!
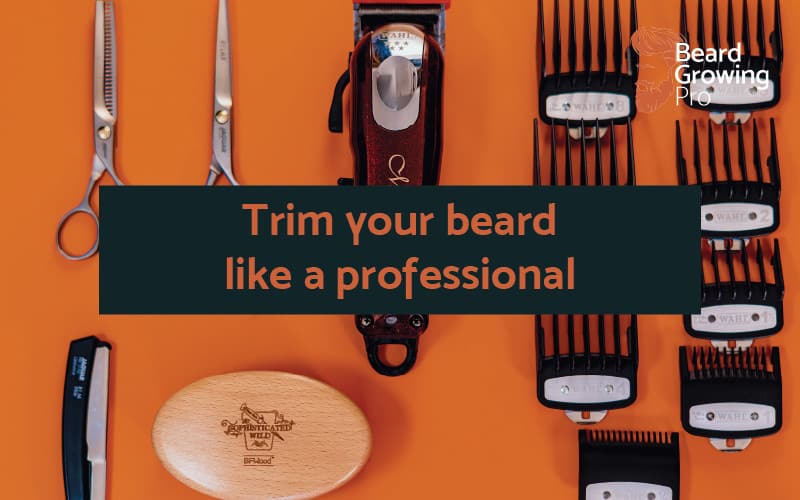
Trimming a beard can be accomplished with simple tools like scissors and a good set of trimmers. Focus on your cheeks, chin, sideburns, and shape at the bottom for a clean and defined look. Practice will increase your confidence!
Trimming a beard is the best way to keep it looking sharp. The good news is that you can do this with just some simple tools – a trimmer and some scissors!
Trim up your beard as often as you need to – but don’t overdo it!
Your beard will never grow if you keep trimming little by little every day. The more you do it, the more you’ll grow in confidence and skill to do it properly every time!
Article Contents
How often to trim your beard?
I share with you in my YouTube video my technique for trimming a beard at home:
As I mentioned in my beard growing tips post, you will spend a lot more time staring into the mirror, looking for a millimetre perfect length and symmetry now that you have a beard. I know that I now spend far more time agonising over the length!
After my morning shower, I will often remove stray hairs or tidy up a section of my beard.
Every two weeks, I will do a major trim and shaping session.
And once every six months, I will see a professional to get advice and a tune-up of my beard style.
BUT don’t overdo the trim up! Check out how often you should trim your beard when it is growing in my other article.
Here are the key outcomes I want from each type of grooming session:
- Daily: I will check if my cheek line or neckline needs shaving. I will comb my beard and remove any wild hairs that I see with scissors. I will not use the beard trimmers as I tend to over trim if I use electric trimmers every day.
- Fortnightly: I redefine the neckline and shape set up by a professional barber a couple of months before. I will take a good set of beard trimmers and trimmer guides to form the cheek and sideburn length. I’ll then take a bit of weight out of the bottom of my beard and then make sure it is symmetrical.
- Evert six months: I will spend $50 or more to reshape and line my beard or get a professional. I use this to get feedback on what I am doing and fine-tune the shape and style I’m after.
Ok, now you know how often you should be trimming and looking after your beard.
Prepare your beard for trimming
Preparing your beard for trimming comes down to ensuring it is washed and clean. I like my beard to look a little more frizzy than usual when I trim my beard.
Wash your beard
Using a beard shampoo will remove the built-up product and the natural oils that have stuck to the outside cuticle of the beard hairs.
This washing step creates a relatively frizzy beard – but this is the perfect place for your beard trim to start.
Blow-dry your beard
Blow-dry your beard until it is touch dry. I often use a hairdryer on low heat to ensure that all moisture has been removed from deep inside my beard. I can feel the coolness at the base of the hairs when my beard is not fully dry. Keep blow drying your beard until you no longer feel the cool sensation at the skin surface under your beard.
Once you have washed and blow-dried your beard, it’s time to get trimming. Let’s get started with the thing that most people get wrong: The Neck Line!
Trim or shave the neckline
The neckline is where your head joins your neck and is more visible on shorter beards. It can be quite challenging as the skin on the neck moves around a lot as you tilt your head up and down.
However, both long and short beards look way better if a couple of key neckline rules are adhered to.
Rule 1: Not TOO high!
This type of mistake is the fatal one that I see many beard owners committing.
There was a trend in the late ’90s to have your beard follow your jawline. It was said to “define your jaw” and “make you look more manly”. The problem is – it has the opposite effect.
The neckline is a tricky spot, and I detail in my other post about how to tackle it properly!
A jawline beard line thins out the depth of the beard and makes it look less substantial. Don’t believe me? Take a look at this:
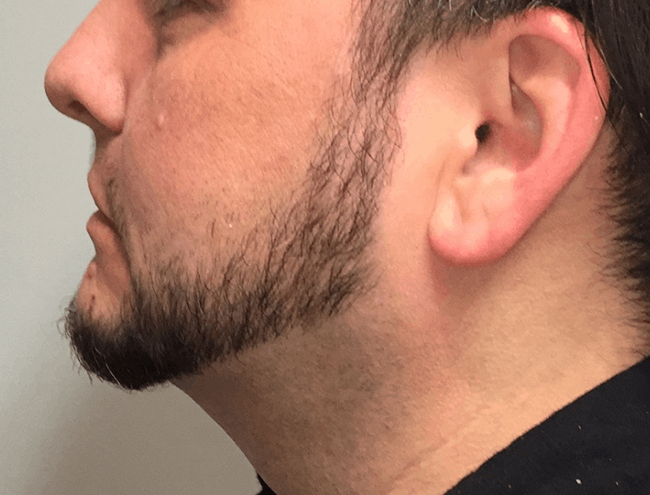
NO! Do not do this!
Also, dare I say it, it tends to be people without well-defined necks that opt for this type of line. So stay away from this style unless you love the look. After all, who am I to tell you what to do with your face!
Rule 2: Find where your head attaches to your neck
Finding where your head attaches to your neck is the only way to discover your perfect neckline for your beard. I do this in two ways.
The first way is to tilt your head forward as far as it will go and push your finger up into the crease. Where the top of the crease sits – that’s your neckline!
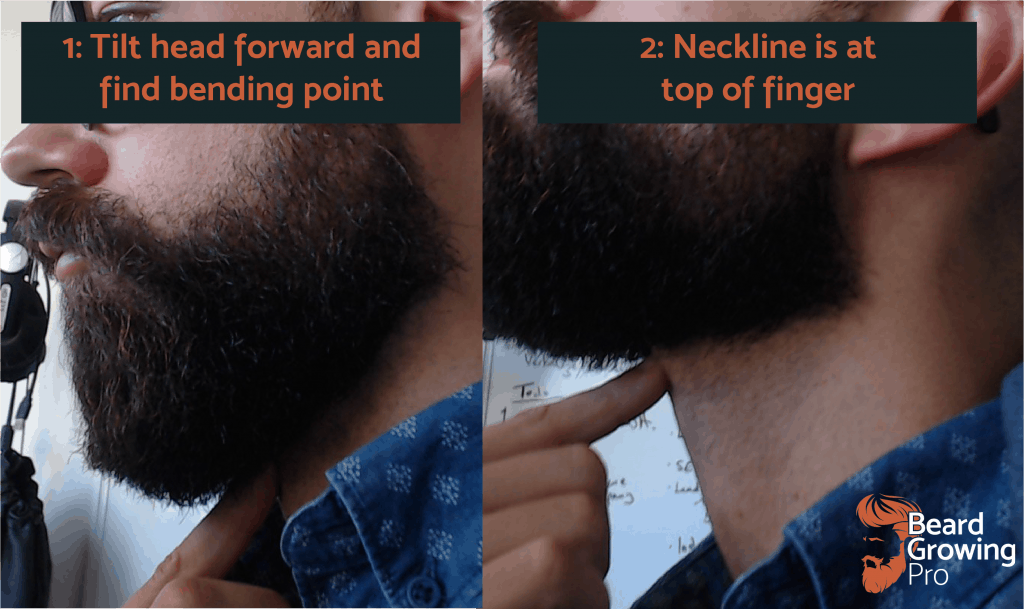
Another option is to find your Adam’s apple and, when looking up, place two fingers on your neck with the bottom finger resting on the top edge of your Adam’s apple. Where the top finger rests on your neck that is your neckline:
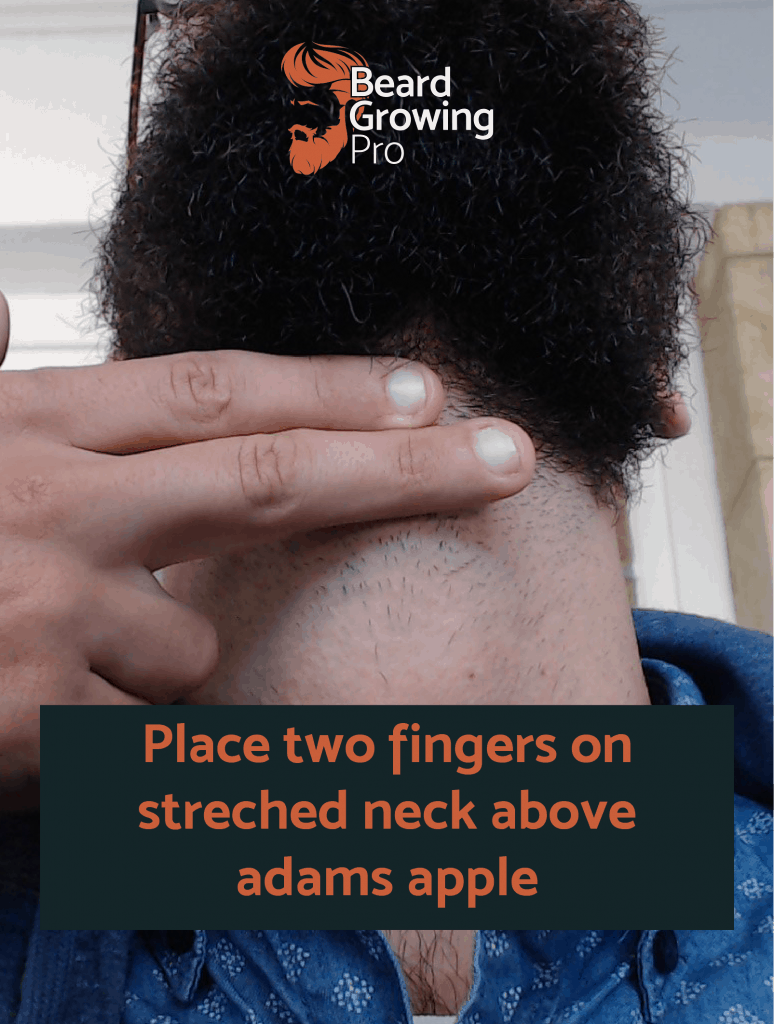
Notice how when my neck is stretched, the middle part of the neckline seems higher than the line at the jawbones. This strange shape change is because the skin stretches more in the middle of the neck, and it can lead to a bit of confusion as to what shape you can end up with.
Once you have found your neckline, you want to trim along it to make it symmetrical and follow it around the side of your head. If in doubt, ask an expert to trim yours in for you – then you can maintain that line for yourself.
Sideburns
Sideburns should be the perfect connector between your head and your beard.
Shorter hairstyles should be blended into your beard, so there’s a seamless connection.
However, if you have a bald head, you could opt for a hard shaved line. I’ve seen this pulled off, and it does look quite striking.
I have opted for a blended gradient from my head to my beard. I use clippers, and the grades I use are shown in the image below:
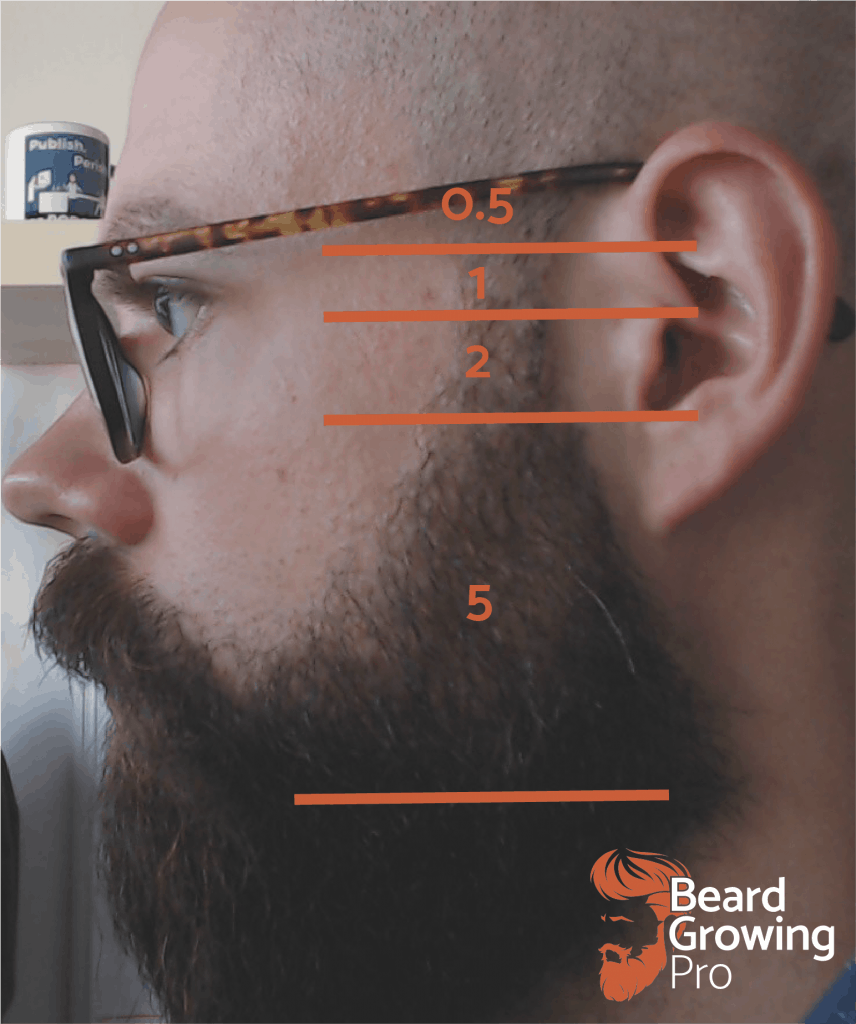
It is important to only trim in the direction of the hair growth for a longer beard length, i.e. down!.
For the shorter lengths at the top of the sideburn, I also trim upward, but I’m very careful to take away hair slowly, and if I have any doubt, I increase the length of the guide for the trimmer.
It’s better to leave too much on than take too much off – you’ll kick yourself. Trust me!
A quick tip: One thing that I have found to tidy up my sideburns are brushing them backwards (towards my ears) and trimming any hairs that are long enough to escape the back border of the sideburn. That means no wild sideburn hairs as the hair moves throughout the day.
Sides and cheeks
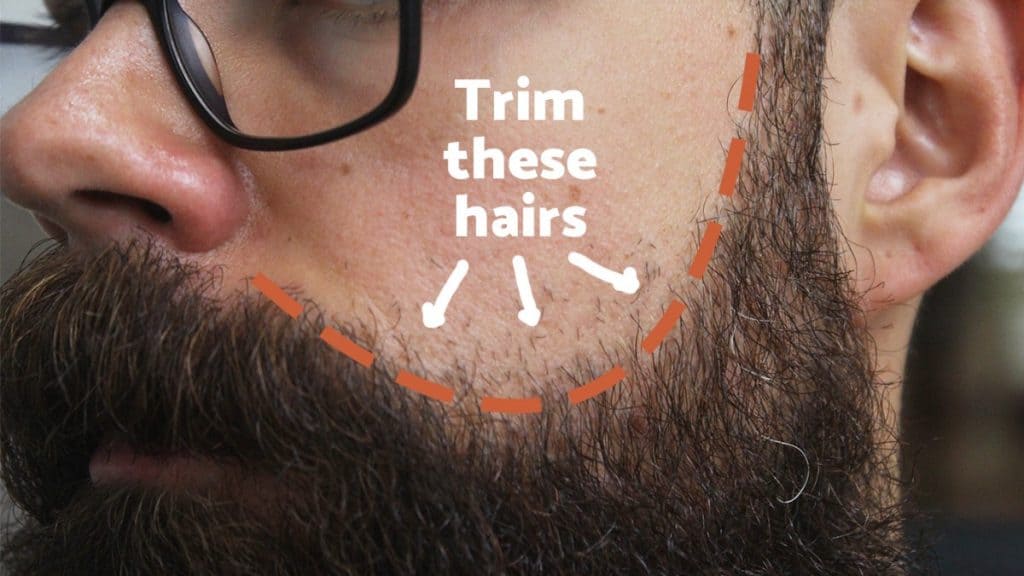
The side and cheeks of the beard are easy to maintain. I use a combination of trimmers set on grade 5 to sweep downward on my face and light trimming with scissors. This combination of actions keeps any super long hairs in check.
Here is where I trim my cheek lines to keep them looking as sharp as possible!
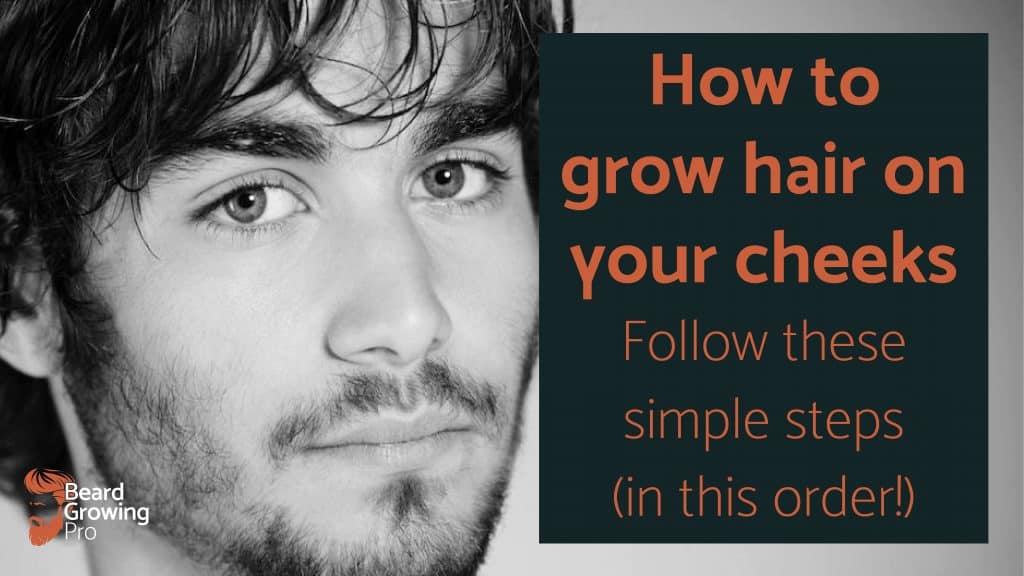
Some people have a huge issue when it comes to growing hair on their cheeks – check out how to grow a beard on your cheeks in my other article.
I recommend that you start on the longest setting on your trimmers and slowly reduce the length until you start to hear the blades curring the hairs. For me, that is guide five.
This simple action will ensure that you don’t have any flyaway hairs to deal with!
If you are growing your beard, leave everything on the sides well alone until it reaches your desired length!
You may want to tidy up the lines of your beard
Moustache
Arguably, the largest variety of shapes and styles are reserved for the crown of your beard – the moustache!

The beards that first attracted me into growing one had large moustaches and thick long – even fancy – styles. However, the practicalities of having a long moustache quickly forced me to reconsider growing a massive one!
To have a long fancy moustache, you have to get used to having hairs in your mouth for a long time before they are long enough to sweep to the sides and hold with beard wax.
Did you know that you can also have a beard without a moustache – check out our insider list!
I now trim my moustache to just below my top lip. I find that this length is the right balance of fullness and practicality that I have come across, personally.
I like it to be a little bit “messy” as I don’t like the super short moustache look:
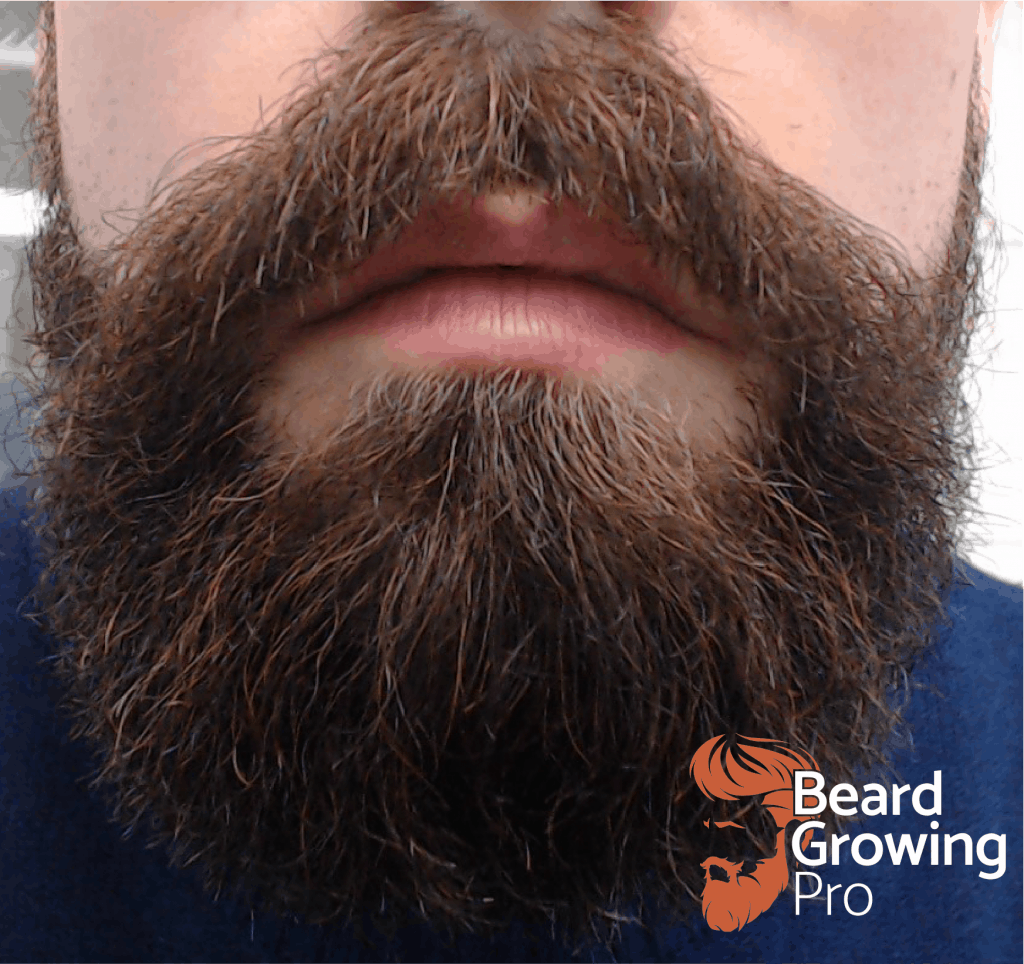
BTW, this is what my beard looks like if it has been through a full day of wear! No grooming was performed before this picture!
Some people love a much shorter and thinner moustache, and if that is your jam. I say go for it!
How to thin out a bushy moustache
To thin down your moustache, you’ll need to use a comb to keep the amount of hair you’re removing with scissors or trimmers to a minimum.
Comb through your moustache, moving away from your face until only a few hairs are visible. These are the hairs you should cut with a pair of sharp scissors or electric trimmers.
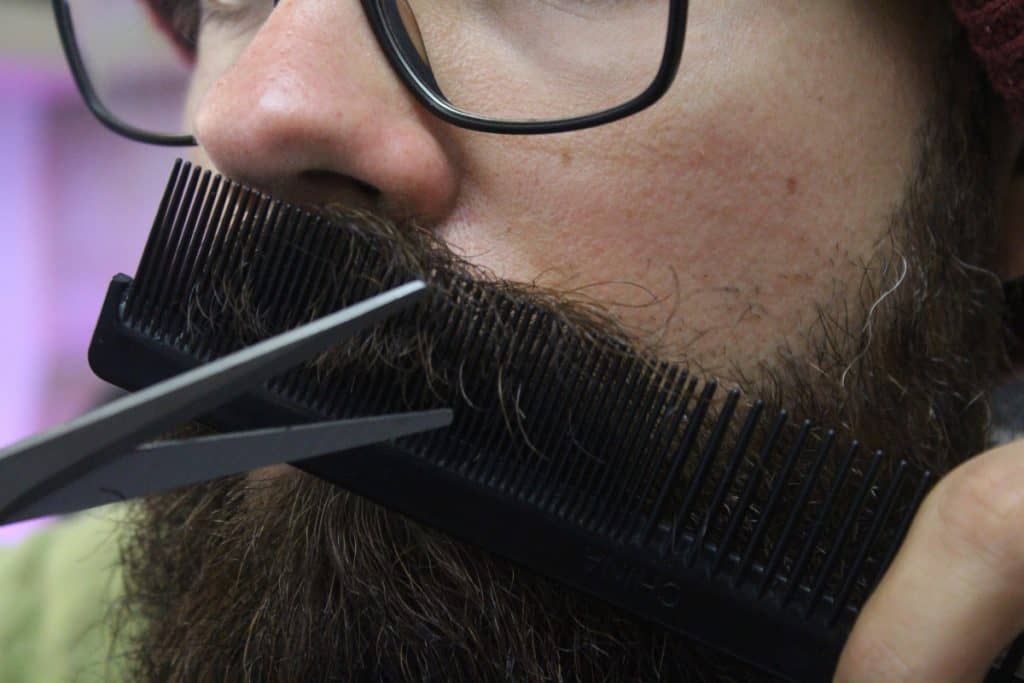
You can also use a guard on your trimmers to cut the hairs on your upper lip to the same length evenly.
Remove a small bit of hair at a time, like other beard trimming recommendations, to avoid over-trimming.
How to trim up the moustache lip line
The next part of the moustache and I like to trim is the lower portion.
The length of the moustache depends on your style, but I like to have my moustache finish at the line between my two lips as they are touching together because I have a relatively big beard.
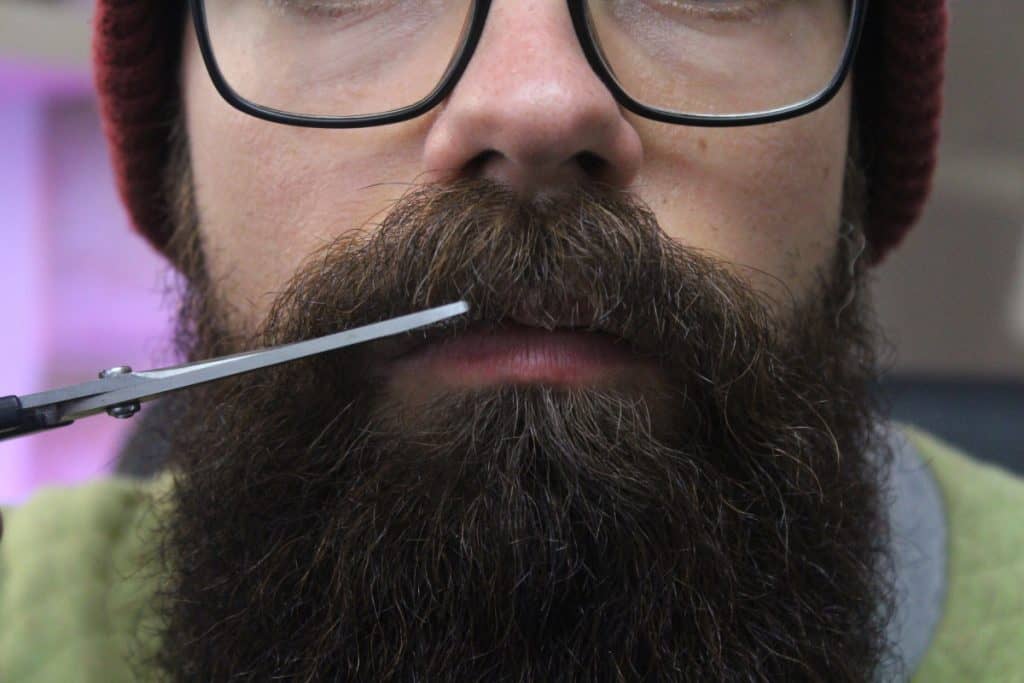
I used to have a much shorter moustache with the bottom line touching and going alongside the top line of my top lip when I first started growing my beard.
The moustache notch
I see professional barbers cut is a notch at the centre of the moustache. It is said to give it a fuller look and make the flowing style more prominent.
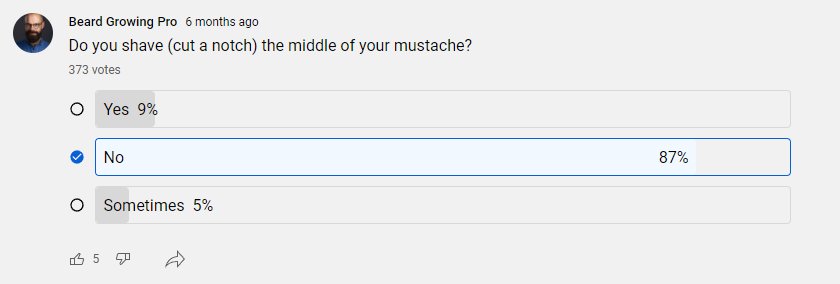
I asked my growing YouTube audience whether or not they shave the middle part of their moustache. This was their response:
As you can see, most people do nothing with their moustaches in the middle and allow them to develop organically. Only 9% of people trim their moustaches regularly or irregularly, with eating and drinking cited as the primary motivators.
Only sometimes, most of the time, it’s not too long where eating and drinking is a pain. But when I leave it to grow, I’ll shave a notch so I can enjoy food!
Quentin Ford, Youtube subscriber
My warning to YOU: I’ve not yet been able to give myself a good notch without over-grooming. I’d recommend seeking professional help with this one!
Here is my Youtube video that talks through shaving a nitch in your beard:
Beard shape
The bottom line and shape are among the biggest grooming choices you have to make when you have a beard. What style are you going to choose?
I recommend googling and saving an imageboard of all the beards you come across and love. I like full medium-sized beards heavy on the chin. That is what I’m heading towards!
If you want to know more about the different beard styles available for your beard, check out my other article – click here – where I go through everything you need to know and more!
This article contains all of the beards you need to know about, including:
- The Balbo beard
- The short shaggy beard
- Short boxed beards
- Faded side medium beards
- Ducktail
- Hipster Beard
- The lumberjack
- Wizard
- And so much more!
As in my previous post – beard-growing tips, do not even attempt to shape your beard for at least six weeks worth of growth! The awesome long beards can take years to get to the owner’s desired length.
Trimming up the bottom shape of your beard means holding the trimmer flat against the bottom of your beard and sweeping back towards your neckline.
I also look down the sides of my beard to trim away any of the flyaway hairs and ensure the bottom of the beard falls straight down.
It is just like trimming up a garden hedge!
For a full rundown on this process and how I shape up my long beard check out my YouTube video below:
If you are doing a full reshape and you are a little nervous: get the first beard shape put in by a professional first. Don’t be cheap and research a good local barber to book yourself an appointment with someone you can trust.
Once the shape has been set, you’ll have something to work with to maintain it. I’ve seen a load of DIY beard shapings, and it can get messy if things don’t quite go to plan.
TOP TIP: As you are sitting in the barber chair take notice of the strokes and techniques that the barber does, the finishing touches to your beard. Do they sure clippers to flatten the sides? Do they use scissors to keep the edges and sides a final tune?
It’s these final steps that you’ll be able to keep up yourself for a few weeks in between your professional sessions.
Everything you need to trim your beard properly!
Here is everything you need to trim up your beard evenly and give yourself a professional look!
Safety razor and blades
| Anself Metal Double-edged Shaving Razor | $13.99 | Link to Amazon |
| 100 NACET Stainless Double Edge Razor Blades | $15.00 | Link to Amazon |
Beard trimmer
| Braun All-in-one trimmer MGK3980 | $54.94 + $9.59 shipping | Link to Amazon |
Beard Brush
| ZilberHaar Beard Brush (Soft Bristles) | $17.99 + $5.18 shipping | Link to Amazon |
Beard Comb
| Kent A FOT Handmade All Fine Tooth Saw-Cut Beard Comb | $17.99 + $5.18 shipping | Link to Amazon |
Beard oil
| Viking Revolution Beard Oil Conditioner | $7.10 + $5.59 shipping | Link to Amazon |
Check out my other recommended beard tools – Click here!
BONUS! Top tips for how to trim a beard:
- Touch it a lot – use your fingers to guide your trimming. I’ve found that touching both sides of my face simultaneously has done more than starring in the mirror!
- Brush between trimming – brush regularly through your trimming session. Trimming and cutting naturally flatten the beard. If you want to see the problem area, brush in between passes of the trimmers to pop up the problem hairs.
- Take off as small an amount as possible – this is the biggest one! Take off as small an amount as possible when trimming your beard! Seriously! It’s easier to take off later, but it is frustrating when you’ve gone a little too far and have to live with a crooked beard for a few weeks!
The final touches to your beard
I firmly believe that trimming up your beard is about 90% of the effort you need to grow a well tamed and styled beard. The extra 10% comes from using beard wax or Beard butter that will nourish and condition your beard and help you keep it looking that extra little bit more special.
Here are all the final touches to your beard that will make a huge difference. These have been tried and tested on my beard over many years.
Wash or blow out the trimmed hairs
After trimming my beard hair, I often blow out all of the little beard hair trimmings that have become stuck in my beard. If I have a particularly important place to go to, I will also re-wash my beard hair to ensure that I get every last little bit out.
I use the highest power setting on my hairdryer with the cool setting to not further stress my beard by overheating it.
Follow up with some product
I often follow up with a product that nourishes and conditions my hair. If I want my beard style to be held well that day, I will use a cold component such as beeswax. Beeswax is often found in Beard balm and other hold products. Stay away from beard butter and oil if you want the hold component – these types of products contain no structural formulation.
- Beard butter – use this if your hair is particularly dry. I like to put beard butter into my beard at least once a fortnight to ensure nourishment and properly conditioned beard hair.
- Beard oil – beard oil is fantastic for medium length beards, but for beards over 2 inches long, I would stick to beard butter or balm. Choose a beard oil with jojoba oil for short beards or Argan oil for maximum absorption into hairs for medium and long beards.
- Beard balm – I often use Beard balm as my daily product and my beard. It contains nourishing ingredients such as Shea butter and beeswax for style hold throughout the day.
Soft bristle brush
Brush your beard with a soft bristle brush to distribute the product evenly and take away those flyaway hairs.
Use the soft bristle brush lightly on the outside layers of hairs and avoid pushing heavily on your beard.
Final placement with your fingers
the last little touch I have found that makes a huge difference to my beard is to run clean fingers and palms over the whole surface of the beard. It helps me keep my beard in shape, and I find it significantly reduces the number of flyaway hairs on my beard.
The final word
This article has been over everything you need to know about trimming up your beard. Take each section step-by-step and follow the guidelines to ensure that you have covered all of the important steps for keeping your beard looking sharp and awesome.
